 |
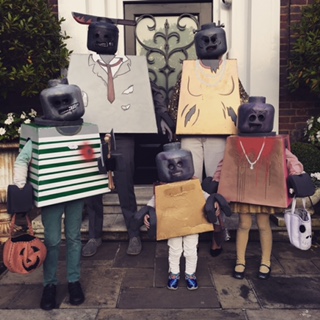
| Happy halloween from us all! Here we are as a Lego zombie family. Thank you to all my followers on Instagram who showed a lot of love for these creations and as many of you have asked to see how I made them i thought i'd write a small post and how to... |
 |
| It was all my friend Laura Fantacci's fault who sent me a photo of a family dressed as characters from the Lego movie. They looked truly awesome and I thought about how I could make something similar for my family. I thought - yeh I could do this no problem. I'm creative, I have a glue gun, what could be so difficult? Well this was possibly the hardest thing I've ever done - and I built a forest in my daughter's bedroom so that just shows you... |
 |
| There weren't too many how-to's? on the internet so I had to figure out what to do myself. I settled on making the body out of foam which I ordered in sheets from EFoam and cut them using an extra long scalpel. I measured the shoulder width of each person and added an inch either side. I then measured from the neck down to the pubic bone and worked out the angle of the body from there. I then stuck the foam sheets with a glue gun to a piece of foam board. I thought this would give the body the rigidity needed as well as a smooth surface to spray on to. I then cut out side panels to join the front and back together, making sure I cut the arm holes quite high up (to give that lego arm quality) and also before I stuck them together. I then added foam squares over the shoulder to give the shoulder support and then cut out a panel with large square missing in the centre for the head to get through. This times 5!!! Ugh. It took forever. |
 |
| Then it came to the heads. What to use? A lot of people who had made these costumes before suggested using polystyrene and then sanding it down. That seemed like a lot of work. So I thought I would try using a Lego storage container. They come in two sizes S and L and I bought the large one to see whether it would work. I tried cutting it and it was really difficult. So I thought I would make them out of paper mache instead. Hmmm. Also loads of work and really difficult to get that smooth Lego plastic head effect. So I went back to the Lego storage head idea and cut a hole into the base and made holes in the face for eyes and the mouth. I then stuck the top of the head down. This was all a huge amount of work so I enlisted my dear friend Savyna into helping. She sprayed the heads a dark grey and the inside in a bronze. |

 |
| We used these pictures from the Lego annual as inspiration for our face painting and body painting |

 |
 |
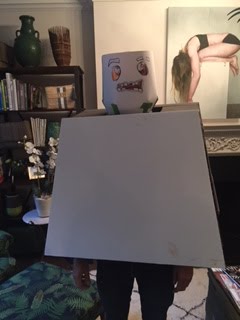
| Here are all our costumes ready to be tried on. We initially added necks made from foam as each of our heads were of course different sizes. But in the end once we tried them on, we found this made the costume even more claustrophobic than normal. So I decided we would all be face painted like zombies underneath our masks. That way our necks would be grey as well as our eyes and mouths, masking anything that might be seen through the holes. Then if we needed to take off our heads, we would still be in character. |
 |
| I did all the make up on us and I wish I'd taken a photo of everyone, we looked so scary and it was such fun transforming ourselves. |
 |
| I was so proud of my kids who all stayed in costume and embraced the evening. They were so proud of their costumes and had the best time, even little ottilie who is only 2. |
 |
| Each year I co host a Halloween party with my friend Karen and I'm in charge of decorations. Pumpkins are a key part to this and my friend Mariza was so kind to go to a farm outside London and pick up 15 for me! I set about by spray painting them with Montana Spray Paint from Cass Art. They have the most brilliant range of colours. I chose neons this year. In past years I've gone with lino cutting Halloween scenes but this year I wanted to return to just doing simple scary faces. I actually spray painted them after hollowing and then cut the faces out. But if I did them again I would hollow them out (make sure to cut the opening at the bottom of the pumpkin not the top - this means you don't get light escaping from the head when you light them) and then cut the faces and then spray. |
 |
| This was one of the huge ones I carved |
 |
| Here they all are lit up |
 |
| And here they are all spray painted |
 |
| I also love buying smaller more decorative pumpkins and painting them gold or bronze and using them as interior decorations. They last for ages and look so chic. I also paint the stalks in pva glue and the dust them with glitter. |
 |
| Here is Karen's home decorated to the hilt! |


 |
| The best thing is that our friends embrace the dressing up with just as much gusto as we do. Here are the Prestons as Matt Smith's Dr Who, The Tardis and the Daleks |
 |
| The headless Steedens have all come to an untimely end thanks to the smallest executioner Steeden |
 |
| The Genest's as The Corpse Bride family |